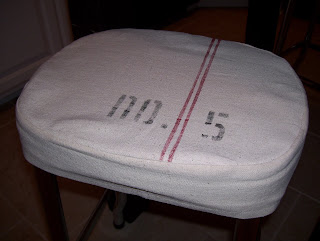
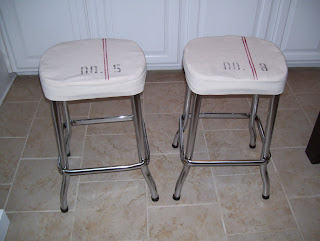
My hubby is terrific at finding things that have great potential and bringing them home to me to turn into something special. It always excites me when he walks in the door and asks me to come take a look at the treasures he's brought home. A few days ago, he came home with these two barstools that he found on the side of the road.
Now, I was jumping for joy over this because I had been trying to find the perfect barstool for our rustic center table/island in the kitchen for quite some time but didn't want to spend much money. They were in great condition with only a little rust and faded seat covers so I got busy with a little steel wool and went to work, removing all the rust from the legs of the stools. I couldn't decide what I wanted to do with the seat and back of the stool but after sitting and staring at them for a good while, it came to me.....faux vintage grain sack slipcover!
After I finished sanding off the rust with the steel wool, I gave the stools a good bath and removed the backs. I picked up a package of my favorite "go to" fabric for pretty much everything, painter's canvas drop cloth at Lowe's. I measured, pieced and pinned my fabric together for the slipcover and sewed together.
To achieve the stripes on the slipcover, I simply taped off my fabric by placing 1/4 inch quilters tape, or masking tape will work just fine, to the area and using a cotton ball, lightly applied barn red fabric paint to the taped area. I lightly applied the paint because I wanted it to appear faded or aged like real vintage grain sack cloth. Then I just lifted the tape and voila, perfect stripes. I really do need to remember to take photos of the process.
Anyway, for the number stencil, I chose the font Weltron Urban from the Word program on my computer, typed No. 5 and No. 3 (my two favorite numbers), enlarged it to 150 and printed it out. I then taped the printout to the dull side of a piece of regular ol' freezer paper from the grocery store and cut both out to create a stencil. Discard the printout when finished cutting.
Next, I placed the freezer paper stencil, shiny side down, where I wanted it on the fabric and ironed it on. Then taking black fabric paint, I dabbed it on the area with a cotton ball, very lightly, and then removed the freezer paper. And there you have it. I am in love with these stools and best thing, they were free! Gotta love that!
Subscribe to:
Post Comments (Atom)


0 comments:
Post a Comment